тЁгтЈИСИ╗УљЦ№╝џСИЊСИџС╗јС║Іу▓Йт»єтЄИУй«тѕєтЅ▓тЎеуџёуаћтЈЉ№╝їУ«ЙУ«А№╝їтѕХжђасђѓ
15895651313
С╝ЂСИџУхёУ┤е
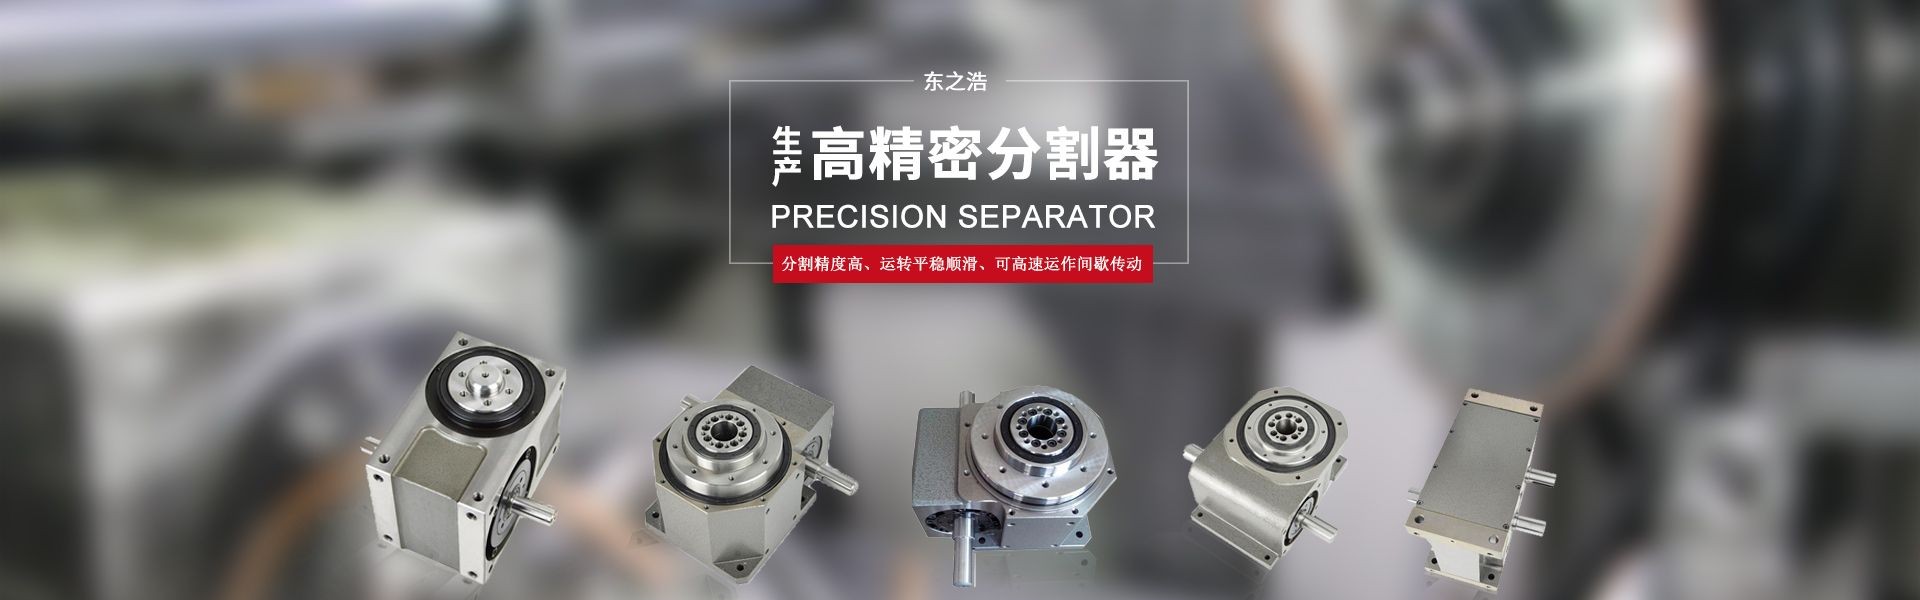
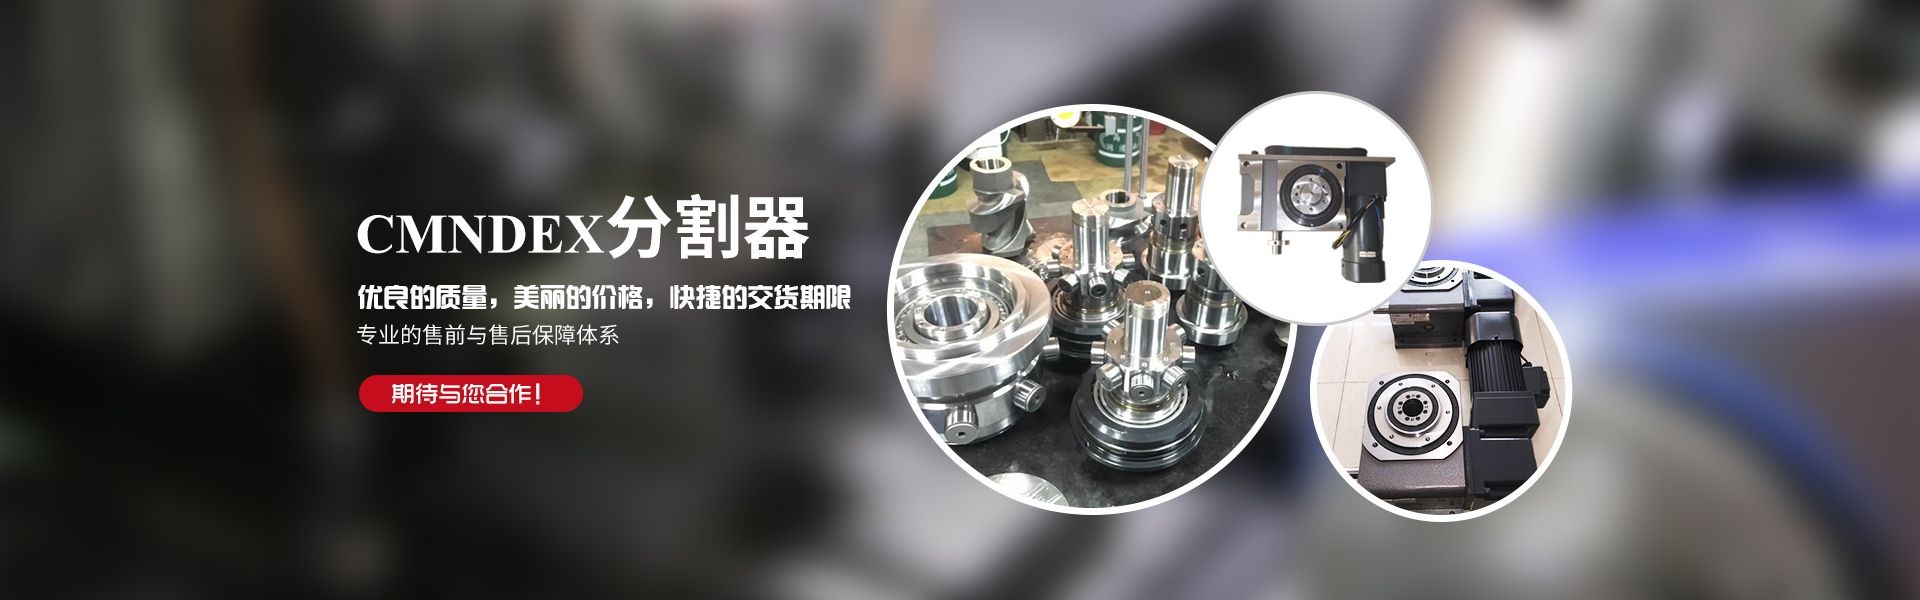
тѕєтЅ▓тЎеТЋЁжџютѕєТъљтЈіу╗┤Тіц
2024-06-07
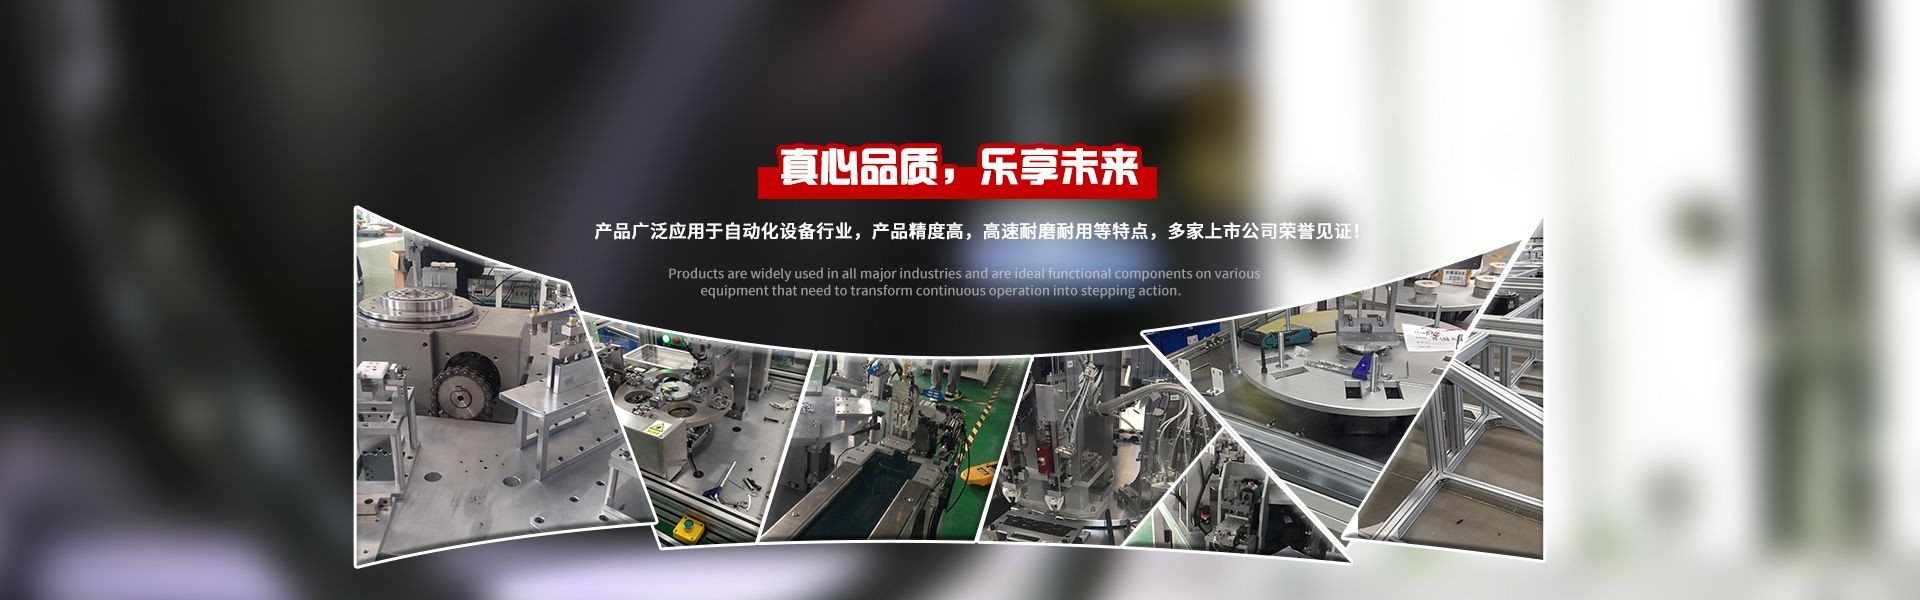
тЄИУй«тѕєтЅ▓тЎеТў»жФўу▓Йт║дуџётЏъУйгтѕєт║джЌ┤ТГЄУЙЊжђЂУБЁуй«№╝їТў»СИђуДЇСИ║жђѓт║ћжФўт║дУЄфтіетїќсђЂжФўу▓Йт║дсђЂжФўжђЪтїќућЪС║ДУБЁжЁЇтю║тљѕУђїСИЊжЌеУ«ЙУ«АуаћтЈЉуџёУЄфтіеТю║Тб░ТаИт┐ЃжЃеС╗Хсђѓт░єУйгуЏўсђЂтљёуДЇУБЁжЁЇТЅДУАїТю║ТъёсђЂСИіСИІТќЎУБЁуй«тњїТјДтѕХу│╗у╗ЪСИјтѕєт║дтЎеу╗ёУБЁтљј№╝їт░▒ТѕљС║єСИђтЈ░ујЄсђЂжФўу▓Йт║дуџёУЄфтіетїќУБЁуй«сђѓт«Ѓт╣┐Т│Џт║ћућеС║јтЇіт»╝СйЊУі»уЅЄсђЂ ућхтГљсђЂућхтЎежЃеС╗ХсђЂС║ћжЄЉсђЂУй╗тиЦсђЂжБЪтЊЂжЦ«ТќЎуГЅтљёУАїСИџуџёУЄфтіетїќућЪС║ДСИјУБЁжЁЇсђѓуЏ«тЅЇ№╝їтЄИУй«тѕєтЅ▓тЎеуџёСй┐ућеУХіТЮЦУХіт╣┐Т│Џ№╝їт»╣тѕєтЅ▓тЎеуџёС┐ЮтЁ╗тњїт«џТюЪТБђТЪЦу╗┤С┐«С╣ЪтЈўтЙЌжЮътИИжЄЇУдЂсђѓ тЄ»тљЇС╗ЋтѕєтЅ▓тЎетЁгтЈИТіђТю»СИ║ТѓеУ«▓У┐░тЄ║уј░тѕєтЅ▓тЎеТЋЁжџюуџётјЪтЏасђЂтѕєтЅ▓тЎеуџёСй┐ућесђЂС┐ЮтЁ╗сђЂТБђТЪЦсђЂу╗┤С┐«тЄаСИфТќ╣жЮб№╝џ
тЄ║уј░тѕєтЅ▓тЎеТЋЁжџюуџётјЪтЏатЈіУДБтє│Тќ╣Т│Ћ№╝џ
1.С╝атіеу│╗у╗ЪтЉетЏ┤уџёТЮѓуЅЕсђЂСИІУДњТќЎуГЅжў╗тЇАУ┐љтіе№╝їУдЂжџЈТЌХТИЁуљєС╝атіеу│╗у╗ЪтЉетЏ┤уџёТЮѓуЅЕсђЂСИІУДњТќЎуГЅсђѓ
2.т«ЅУБЁтЪ║жЮбСИјтѕєтЅ▓тЎеуџёУЙЊтЁЦсђЂУЙЊтЄ║Уй┤Тќ╣тљЉСИјУ«ЙтцЄТЅђжюђуџёУЙЊтЁЦсђЂУЙЊтЄ║Тќ╣тљЉСИЇтљїУй┤сђѓтЂЈТќюТѕќтЂЈт┐ЃсђѓУ┐ЎТаит░▒С╝џтй▒тЊЇтѕ░УЙЊтЄ║у▓Йт║д№╝їУђїСИћС╝џСИЦжЄЇтю░ТЇЪтЮЈтѕєтЅ▓тЎесђѓтЏаСИ║У┐ЎТЌХ№╝ї У»ЦтѕєтЅ▓тЎетцёС║јСИЇТГБтИИуџётЈЌтіЏуіХТђЂсђѓУДБтє│Тќ╣Т│Ћ№╝џУ░ЃТЋ┤т«ЅУБЁтЪ║жЮбСИјтѕєтЅ▓тЎеуџёУЙЊтЁЦсђЂУЙЊтЄ║Уй┤Тќ╣тљЉсђѓ
3.СИЇжђѓтйЊуџёУ░ЃТЋ┤№╝їС╝џтй▒тЊЇтѕєтЅ▓у▓Йт║д№╝їтЄ║уј░тє▓тЄ╗сђЂтЎфтБ░№╝їТЇЪтЮЈтѕєтЅ▓тЎеУЙЙСИЇтѕ░жбёТюЪуџёУйгжђЪтњїТЅ┐тЈЌУЃйтіЏсђѓС╗јУђїу╝ЕуЪГтѕєтЅ▓тЎеуџёт»┐тЉйсђѓУ░ЃТЋ┤тїЁТІгСИцжЃеС╗й№╝џУй┤жЌ┤УиЮуд╗уџёУ░ЃТЋ┤тњїУЙЊтЁЦсђЂУЙЊтЄ║Уй┤тљЉСйЇуй«уџёУ░ЃТЋ┤сђѓ
1сђЂУй┤жЌ┤УиЮуд╗уџёУ░ЃТЋ┤№╝џ
сђђсђђтдѓТъютѕєтЅ▓тЎежђџУ┐ЄжЋ┐ТЌХжЌ┤уџёСй┐ућесђЂуБеТЇЪ№╝їтюет«џСйЇтиЦСйютї║тЄ║уј░С║єжЌ┤жџЎ№╝їжѓБС╣ѕУдЂжђџУ┐ЄУй┤жЌ┤УиЮуд╗уџёУ░ЃТЋ┤ТХѕжЎцТГцжЌ┤жџЎсђѓУ┐ЎтЈ»жђџУ┐ЄтљїТГЦУ░ЃТЋ┤УЙЊтЁЦУй┤СИцуФ»уџётЂЈт┐ЃтЦЌУ┐ЏУАїсђѓ
сђђсђђ2сђЂУЙЊтЁЦсђЂУЙЊтЄ║Уй┤тљЉСйЇуй«уџёУ░ЃТЋ┤№╝џ
сђђсђђтЈ»жђџУ┐ЄУ░ЃУіѓтЄИУй«СИцСЙДуџёжћЂу┤ДУъ║Т»ЇТѕќУЙЊтЁЦУй┤СИцСЙДУй┤ТЅ┐тјІуЏќТЮЦУ░ЃТЋ┤тЄИУй«тѕєтЅ▓тЎеуџёУй┤тљЉСйЇуй«сђѓтЈ»УЃйжђџУ┐ЄУ░ЃУіѓУЙЊтЄ║Уй┤СИцуФ»уџёУй┤ТЅ┐тјІуЏќТѕќтљјуФ»уџёжћЂу┤ДУъ║Т»ЇУ░ЃТЋ┤тѕєтЅ▓Уй«уџёУй┤тљЉСйЇуй«сђѓ
сђђсђђтюеТГцТ│еТёЈ№╝џтѕєтЅ▓тЎетЄ║тјѓу╗ЈУ┐Єу▓Йт┐ЃУ░ЃТЋ┤№╝їСИЇтЁЂУ«ИућеТѕиуДЂУЄфУ░ЃТЋ┤№╝їС╗Цжў▓У»»У░ЃсђѓУІЦуА«жюђУ░ЃТЋ┤тЈ»СИјтјѓТќ╣сђѓ
3.тѕєтЅ▓тЎеуџётЄИУй«Уй┤Уй┤ТЅ┐СИјУй┤жбѕжЁЇтљѕжЌ┤жџЎтцДС║ј0.15mmТЌХ№╝їт║ћТЏ┤ТЇбТќ░Уй┤ТЅ┐С╗ЦТЂбтцЇУй┤жбѕСИјУй┤ТЅ┐уџёТГБтИИжЁЇтљѕсђѓ
сђђсђђ№╝ѕ1№╝ЅТа╣ТЇ«тЄИУй«Уй┤Уй┤жбѕуџёт░║т»И№╝їжђЅТІЕтљїу║ДС┐«уљєт░║т»ИуџёУй┤ТЅ┐сђѓ
сђђсђђ№╝ѕ2№╝ЅтЄИУй«Уй┤Уй┤ТЅ┐СИјТЅ┐тГћуџёжЁЇтљѕт║ћТюЅСИђт«џуџёУ┐ЄуЏѕжЄЈсђѓ
№╝ѕ3№╝Ѕт░єтЄИУй«Уй┤УБЁтЁЦУй┤ТЅ┐тГћтєЁУйгтіеТЋ░тюѕ№╝їТа╣ТЇ«ТЮЙу┤Дт║дтњїТјЦУДджЮбуД»уџёТЃЁтєхУ┐ЏУАїжђѓтйЊуџёУ░ЃТЋ┤сђѓТБђжфїжЁЇтљѕТЮЙу┤Дт║дуџёТќ╣Т│ЋТў»№╝џтюеУй┤ТЅ┐тєЁТХѓТю║Т▓╣№╝їУйгтіетЄИУй«Уй┤ТЋ░тюѕтљј№╝їтѕєтЅ▓тЎеућеТЅІТїЄТІетіеТГБТЌХжй┐Уй«ТЌХ№╝їт║ћУйгтіеуЂхТ┤╗ТЌатЇАжў╗уј░У▒А№╝їСИіСИІТЅ│тіетЄИУй«Уй┤ТЌаТўјТўЙуџёжЌ┤жџЎТёЪУДЅсђѓ
№╝ѕ4№╝ЅТа╣ТЇ«Уй┤жбѕт░║т»Итѕ«тЅіУй┤ТЅ┐№╝їТќ╣Т│ЋТў»№╝џТііУй┤ТЅ┐тЦЌтюеуЏИт║ћуџёУй┤жбѕСИі№╝їУйгтіеУй┤ТЅ┐ТЋ░тюѕтљјтЈќСИІ№╝їТа╣ТЇ«ТјЦУДдТЃЁтєхС┐«тѕ«Уй┤ТЅ┐тљѕжЄЉ№╝їС┐«тѕ«тљјтєЇТііУй┤ТЅ┐тЦЌтюеУй┤жбѕСИіУйгтіе№╝їтЈќСИІУй┤ТЅ┐тљјТа╣ТЇ«ТјЦУДдТЃЁтєхтєЇТгАС┐«тѕ«№╝їтдѓТГцтЈЇтцЇУ┐ЏУАїсђѓтѕ«тЅіУЄ│Уй┤ТЅ┐СИјУй┤жбѕжЌ┤ТЈњтЁЦуџётјџУќёУДётјџт║д=Уй┤ТЅ┐СИјУй┤ТЅ┐тГћуџёжЁЇтљѕУ┐ЄуЏѕжЄЈ+Уй┤ТЅ┐СИјУй┤жбѕуџёжЁЇтљѕжЌ┤жџЎ№╝їТІЅтіетјџУќёУДёТЌХуеЇТюЅжў╗тіЏСИ║тљѕжђѓсђѓУ┐ЎТаи№╝їтЄИУй«тѕєтЅ▓тЎетйЊТііУй┤ТЅ┐тјІтЁЦУй┤ТЅ┐тГћтљј№╝їућ▒С║јУй┤ТЅ┐тєЁтЙёуџёу╝Ет░ЈжЄЈТјЦУ┐ЉУй┤ТЅ┐СИјУй┤ТЅ┐тГћжЁЇтљѕуџёУ┐ЄуЏѕжЄЈ№╝їтЇ│тЈ»тЙЌтѕ░ТЅђжюђуџёжЁЇтљѕжЌ┤жџЎсђѓтѕ«тЅіТЌХ№╝їУдЂт░йжЄЈСй┐Уй┤ТЅ┐тБЂтјџтЮЄтїђ№╝їС╗ЦС┐ЮУ»ЂтљёжЂЊУй┤ТЅ┐уџётљїт┐Ѓт║дсђѓ
сђђсђђ№╝ѕ5№╝ЅжЊ│СИІТ▒йу╝ИСйЊуџётљјуФ»уЏќ№╝їТІєжЎцТЌДУй┤ТЅ┐сђѓТќ░Уй┤ТЅ┐тјІтЁЦТЌХт║ћТ│еТёЈт»╣ТГБТ▓╣тГћ№╝їтљёжЂЊтЄИУй«Уй┤Уй┤ТЅ┐СИЇтЙЌУБЁжћЎ№╝їС╗ЦтЁЇтй▒тЊЇТЉЄУЄѓТю║ТъёуџёТХдТ╗Љсђѓ
сђђ 5.тЄИУй«ТЇЪС╝цтЄ║уј░тѕєтЅ▓тЎеТЋЁжџю№╝їСИЇУЃйтєЇСй┐уће№╝їтЈ»ТЏ┤ТЇбтЄИУй«№╝їТЌаТЇЪС╝цТѕќУЙЃУй╗ТЇЪС╝цС╗ЇтЈ»у╗Ду╗ГСй┐ућесђѓжџЈТЌХТИЁуљєС╝атіеу│╗у╗ЪтЉетЏ┤уџёСИІУДњТќЎсђЂТЮѓуЅЕуГЅ№╝їС╗Цжў▓жў╗тЇАУ┐љтіеУЙЊтЁЦсђЂУЙЊтЄ║Уй┤У┐ъТјЦС╗ХтЈіС╝атіеС╗ХУдЂт«џТюЪТБђС┐«сђѓТ│еТёЈжЊЙУй«сђЂУЂћУй┤тЎесђЂуџ«тИдУй«сђЂжй┐Уй«тЈіУЙЊтЄ║С╝атіеСйЊуГЅТў»тљдТЮЙт╝Џ№╝їжЊЙУй«сђЂуџ«тИдуџёт╝ау┤ДуеІт║д№╝їжй┐Уй«уџётЋ«тљѕжЌ┤жџЎуГЅт║ћС┐ЮУ»ЂТГБтИИуіХТђЂсђѓтдѓТюЅСИІУ┐░ТЃЁтєхтЈЉуј░№╝їт║ћуФІтЇ│тЂюТГбУ┐љУйгсђѓтЈЉућЪт╝ѓтИИтБ░тЊЇсђѓтЄИУй«тѕєтЅ▓тЎетюетЄИУй«жЮЎТГбтї║ТюЅтЈЇтљЉтє▓тЄ╗сђѓтЈЉућЪт╝ѓтИИТї»тіесђѓтюет»╣т║ћуџёжЌ┤ТГЄТгАТЋ░СИГТЌатѕєтЅ▓УЙЊтЄ║ТѕќтюеТЪљСИђСйЇуй«тѕєтЅ▓УЙЊтЄ║СИЇуе│т«џТѕќтЁеТЌатѕєтЅ▓УЙЊтЄ║сђѓ
6.тѕєтЅ▓тЎеСИГуџёТ╗џжњѕУй┤ТЅ┐ТЇЪтЮЈтЄ║уј░тѕєтЅ▓тЎеТЋЁжџю№╝їтЈ»т░єУЙЊтЄ║Уй┤тЈќтЄ║№╝їТЏ┤ТЇбТ╗џжњѕУй┤ТЅ┐сђѓТюЅСИцуДЇТќ╣т╝Ј№╝їСИђТў»т░єУЙЊтЄ║тЦЌТЮЙт╝ђ№╝їт░єУЙЊтЄ║Уй┤тЈќтЄ║№╝їСИЇУдЂТЮЙтіетљјуФ»уџётјІуЏќ№╝їУ┐ЎТаитєЇУАїУБЁтЁЦТЌХУй┤тљЉСйЇуй«СИЇтЈўсђѓС║їТў»ТЮЙт╝ђУЙЊтЄ║Уй┤тљјуФ»уџёжћЂу┤ДУъ║Т»ЇтњїтЅЇуФ»уџёУЙЊтЄ║тЦЌ№╝їтЇ│тЈ»т░єУЙЊтЄ║Уй┤У┐ътљїтЦЌСИђУхитЈќтЄ║№╝їтєЇУБЁтЁЦТЌХ№╝їтЈфжюђжћЂу┤ДУъ║Т»Ї№╝їтЇ│тЈ»Сй┐УЙЊтЄ║Уй┤тЏътѕ░тјЪТЮЦуџёСйЇуй«сђѓ
УћАТЎЊСИю №╝ѕтЁѕућЪ№╝Ѕ
15895651313
15895651313
szdongzhihao@126.com
УІЈтиътИѓТўєт▒▒жФўТќ░тї║Тќ░тЇЌСИГУи»№╝Ћ№╝ќ№╝ўтЈи
www.114global.com СИГтЋєтБ╣тБ╣УѓєТ▓│тїЌуйЉу╗юуДЉТіђТюЅжЎљтЁгтЈИуЅѕТЮЃТЅђТюЅ┬а┬а УЂћу│╗тю░тЮђ№╝џТ▓│тїЌуюЂуЪ│т«Хт║ётИѓТАЦУЦ┐тї║СИГт▒▒СИюУи»118тЈиСИюТќ╣Тќ░СИќуЋїСИГт┐Ѓ6009т«ц т╣│тЈ░ТюЇтіАућхУ»Ю№╝џ4006299930┬аућхС┐АСИџтіАу╗ЈУљЦУ«ИтЈ»У»Ђ№╝џтєђB2-20240433┬а┬а тєђICPтцЄ19018905тЈи-9┬а┬а тєђтЁгуйЉт«ЅтцЄ13010402003046тЈи