

Certainly, those who have used polyurethane edge-bonded composite boards can attest to their convenience and durability. Indeed, this type of board has brought about a significant change in the panel industry, with excellent results. But do you know the installation steps? Many may not be aware, so let's take a look together below.
The main steps can be divided into the following.
The entire wall installation is based on the starting panel. Therefore, the installation of the bottom water pan components and the balancing brackets requires leveling operations with a level instrument. When fixing the bottom water pan components with self-tapping screws, the spacing should be maintained around 1.5 meters to ensure flatness of the components, enhance the aesthetic effect of the polyurethane rock wool board, and it is advisable for the spacing of the bottom balancing brackets not to exceed 2 meters.
(2) Insert the starting board horizontally into the bottom balancing bracket and secure it. After installation, the number of nails at the male end should be spaced at 1.5 meters. To ensure the boards are straight, prioritize the installation of corner boards when present. When handling corner boards, protect the corner area to prevent damage. During hoisting, position the hoisting strap as close to the board's center of gravity as possible. Use guy ropes to prevent friction between the board and the purlins, maintaining balance.
(3) Ensure tight connections at the junctions during construction. Pay attention to maintaining the angle of the corner boards, ensuring that the flat surface of the corner boards aligns with the main wall board surface. Perform horizontal alignment work every 4-5 boards during construction to guarantee the aesthetic installation of the corner boards and enhance the architectural beauty.
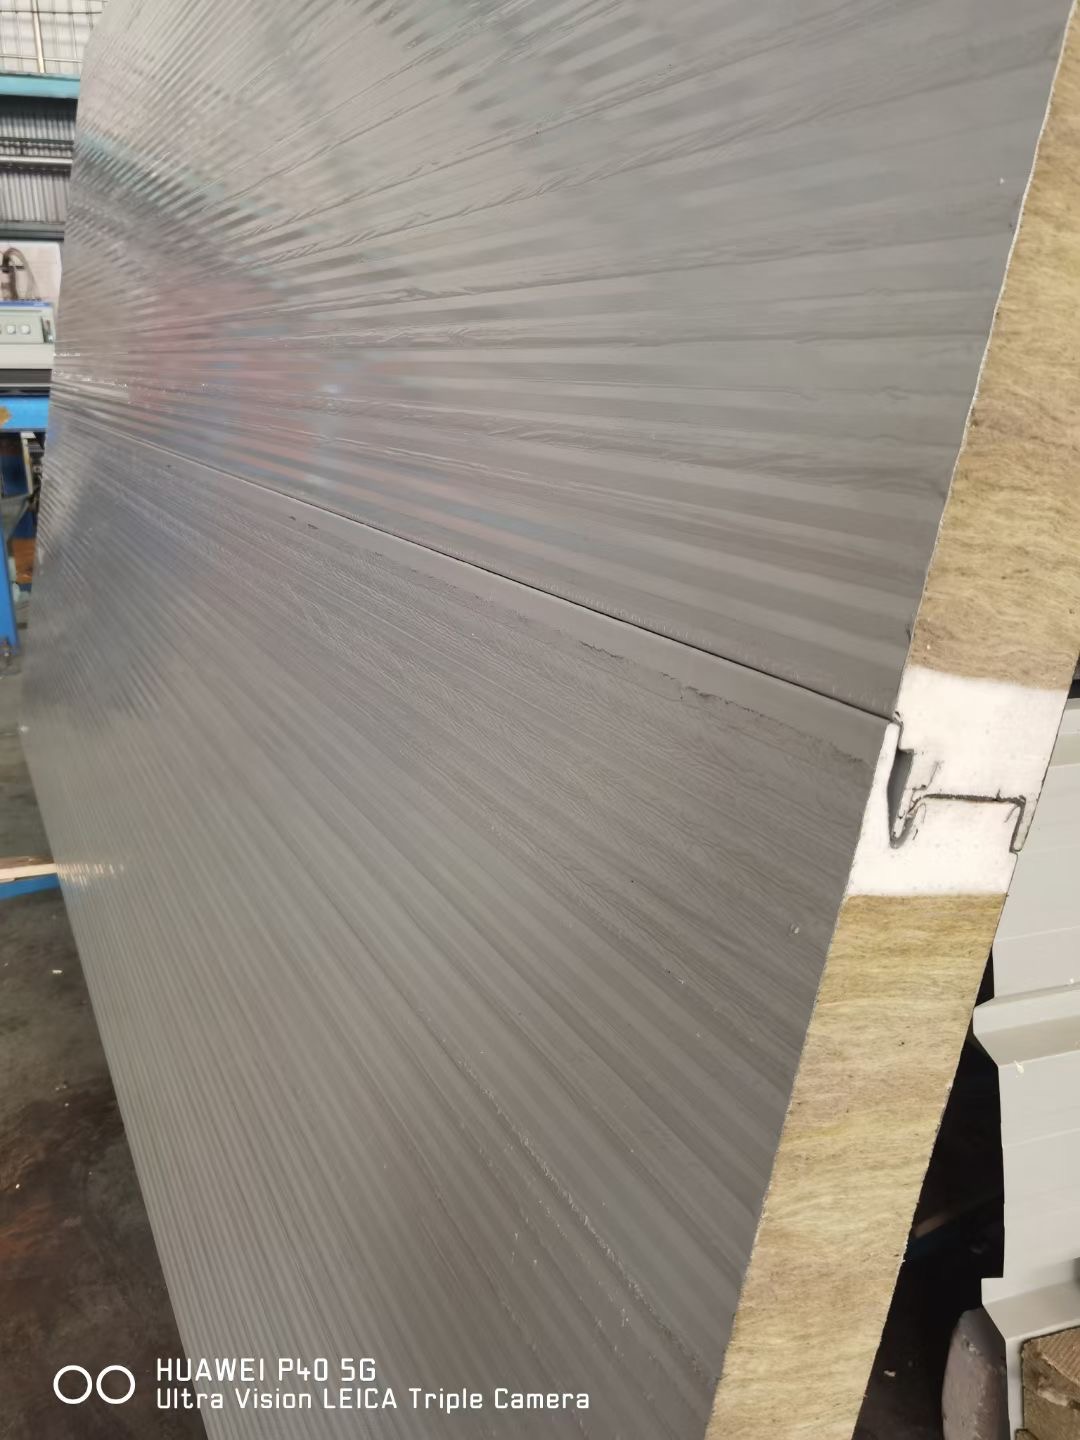
During the installation of gap fasteners, a 4cm gap should be left between adjacent polyurethane rock wool boards. Vertical joists are required to be placed at the center joint during installation. The flanges of the center joint trim should be coated with adhesive for waterproofing treatment. After installation, additional adhesive should be applied at the junction of the board's insertion seam and the center joint, and insulating material should be filled into the center joint.
(5) Installation of finishing strips: The finishing strips at door and window openings can be cut to fit on-site requirements. It is required that each seam is sealed with glue for waterproofing treatment.